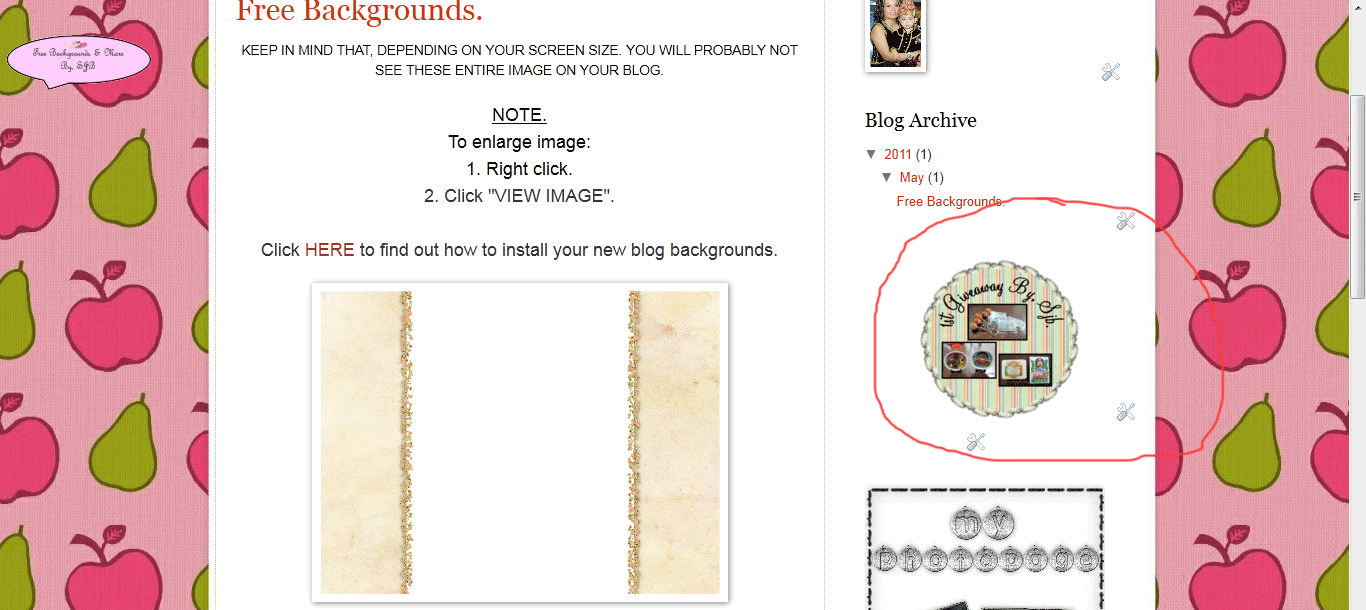
NOTE.
To enlarge image:
1. Right click.
2. Click "VIEW IMAGE".
1. Login to Photobucket and upload your banner or picture.
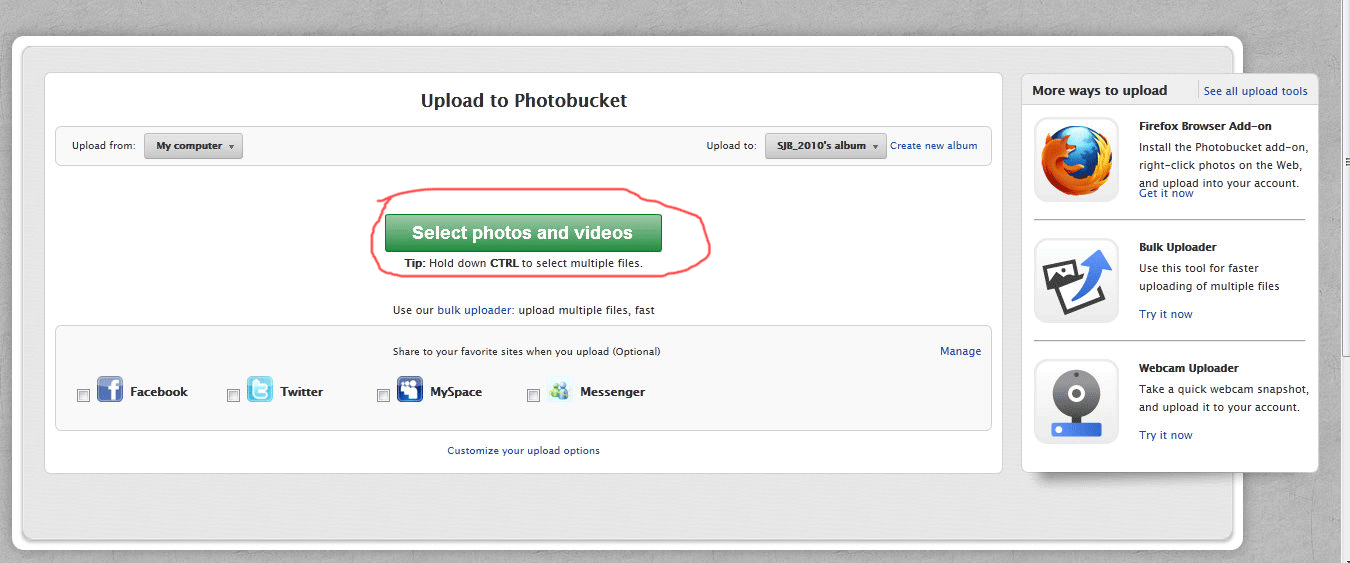
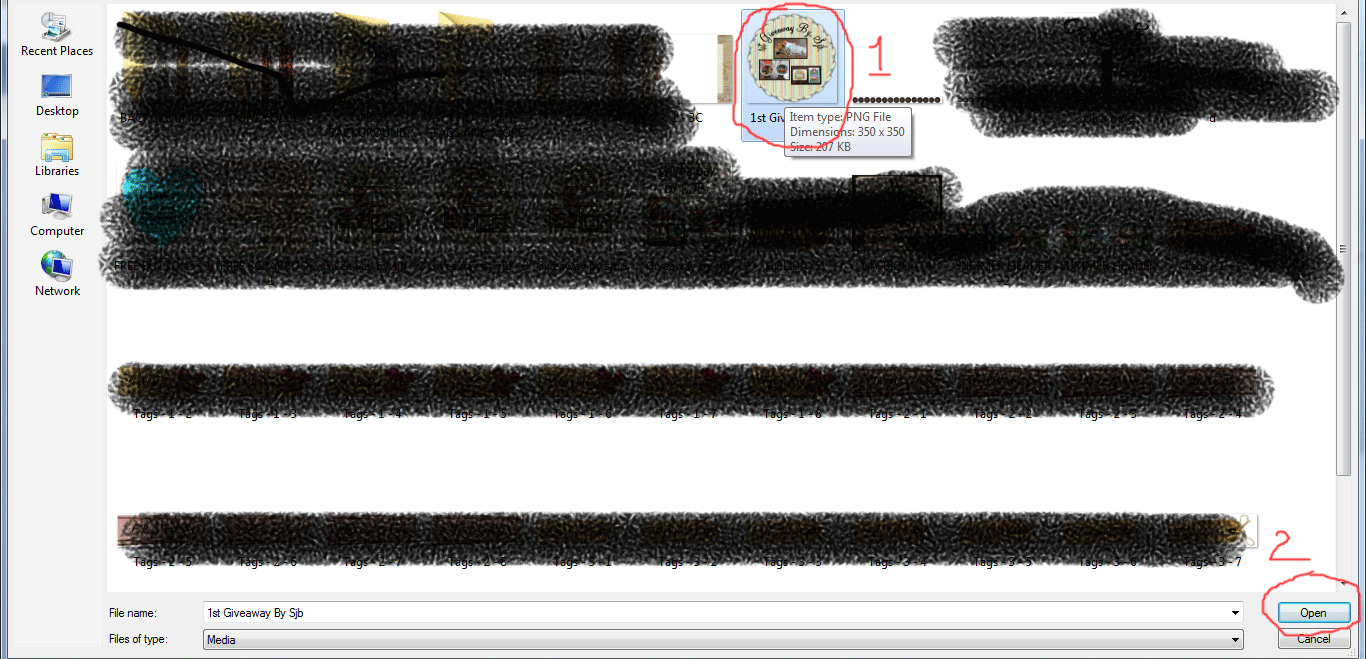
2."1 - FIND YOUR BANNER OR PICTURE" and "2 - OPEN".
3. "CLICK on IMAGE".
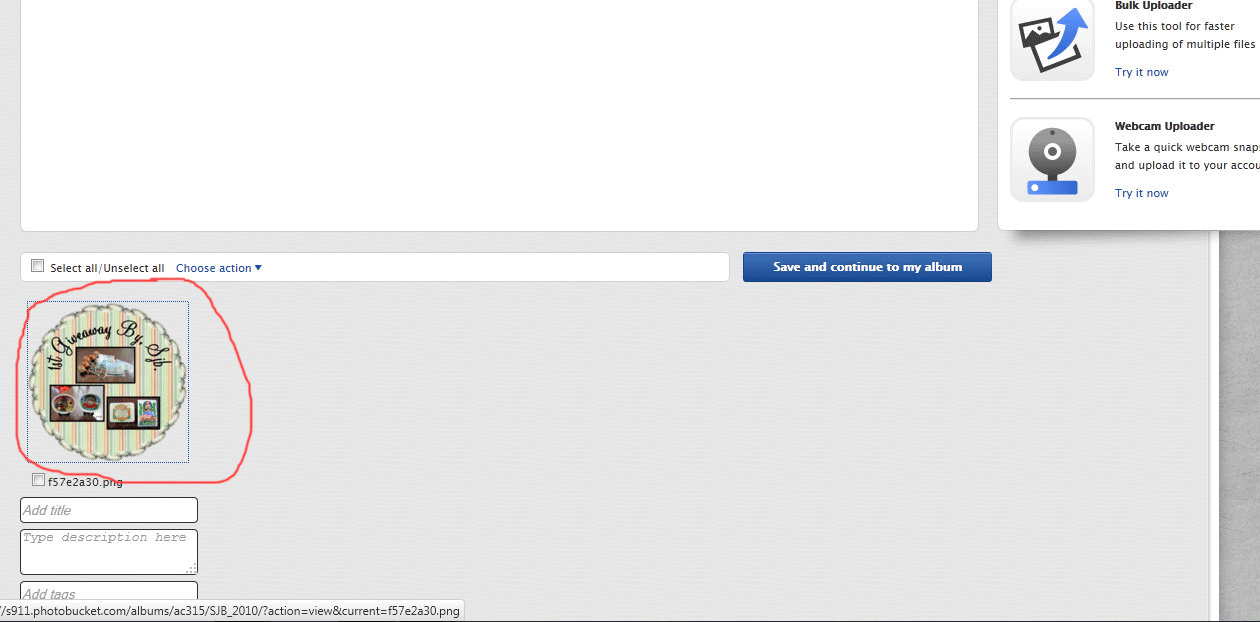
4. And "RE-SIZE".
Note: Click on any size you want.
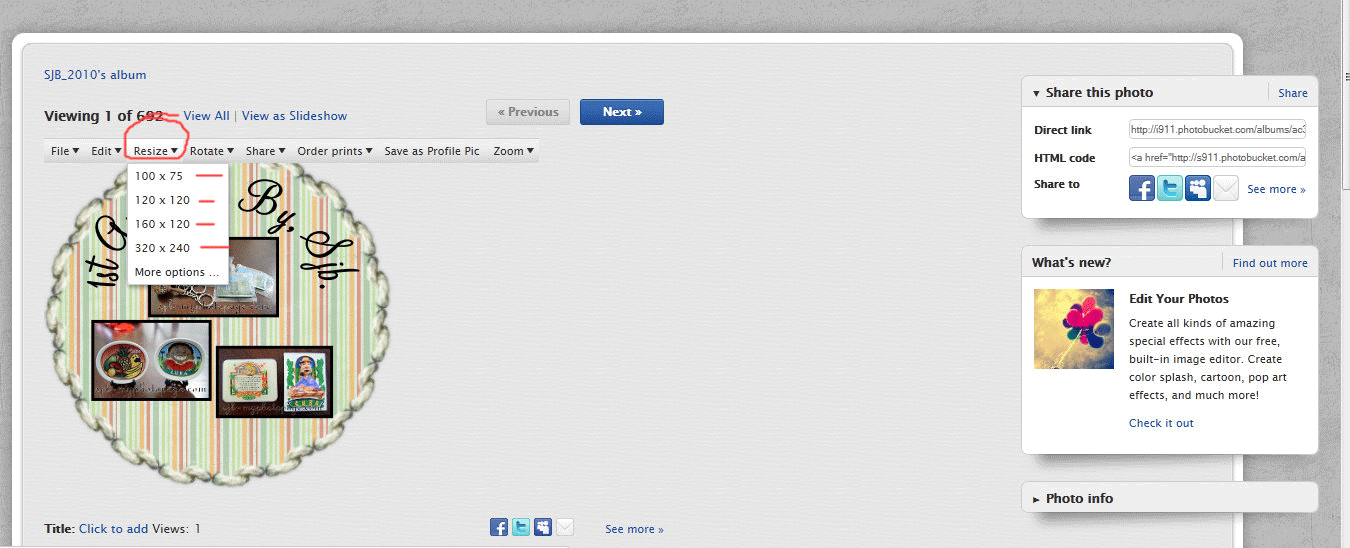
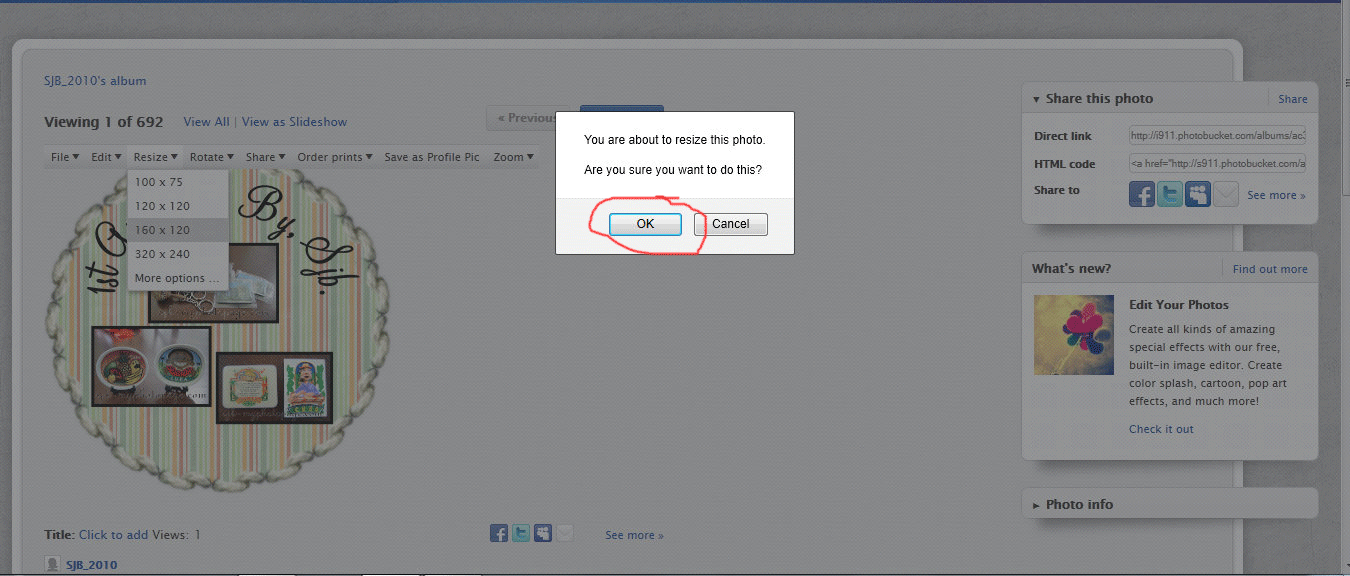
5. Click "OK".
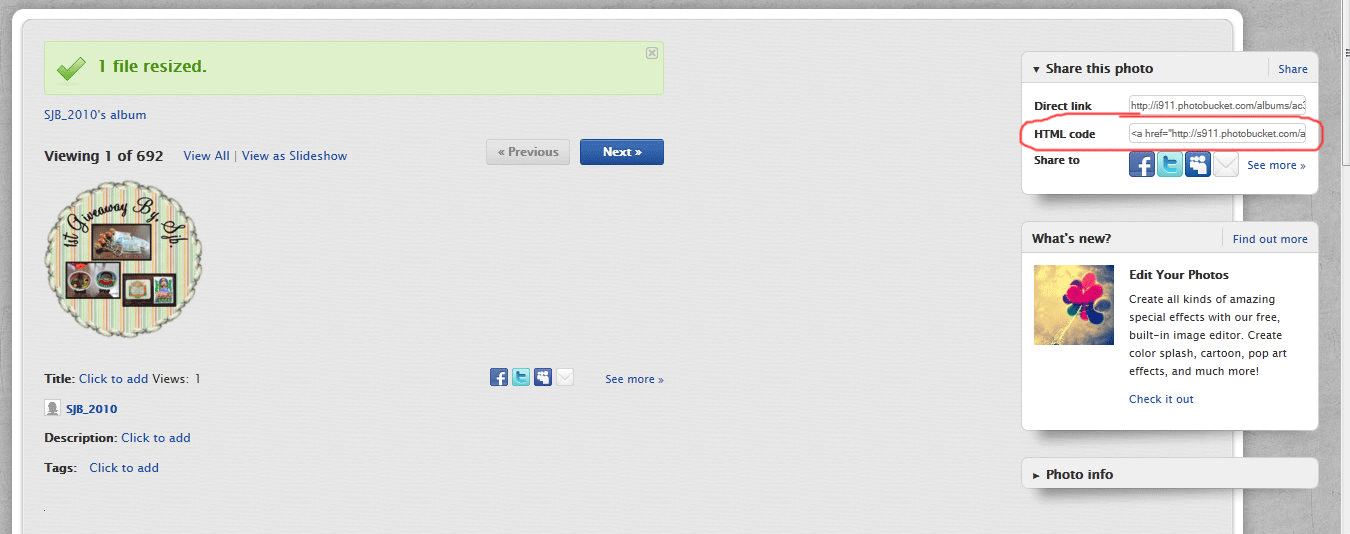
6. You need this code later.
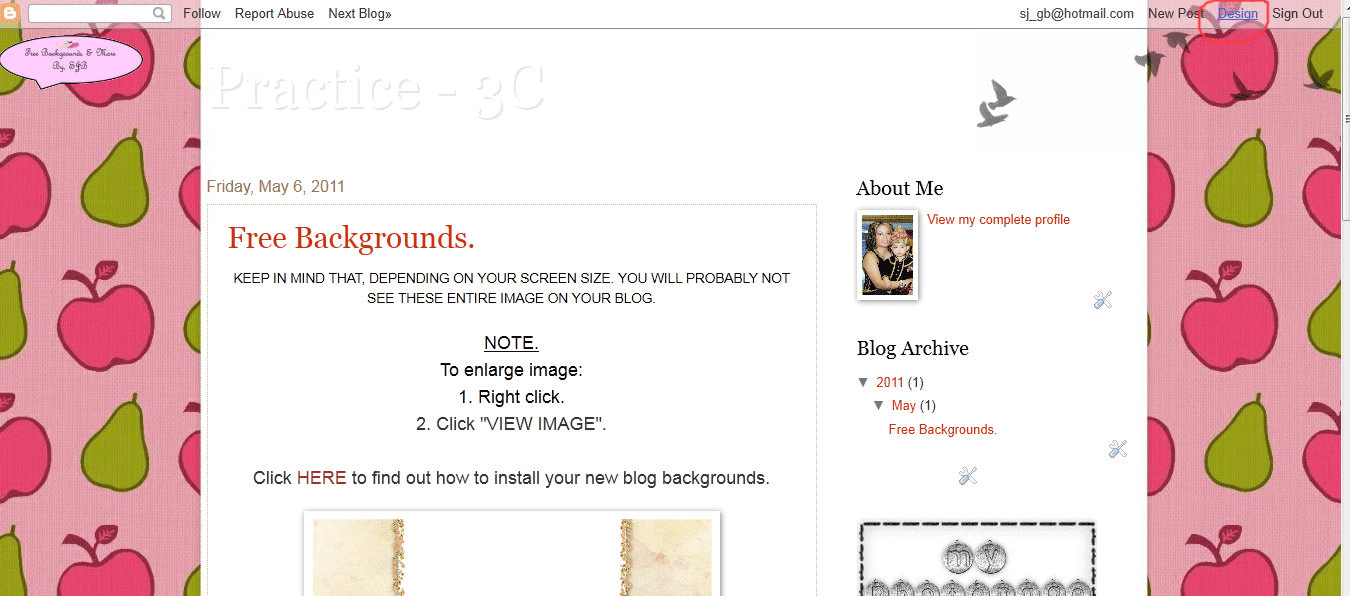
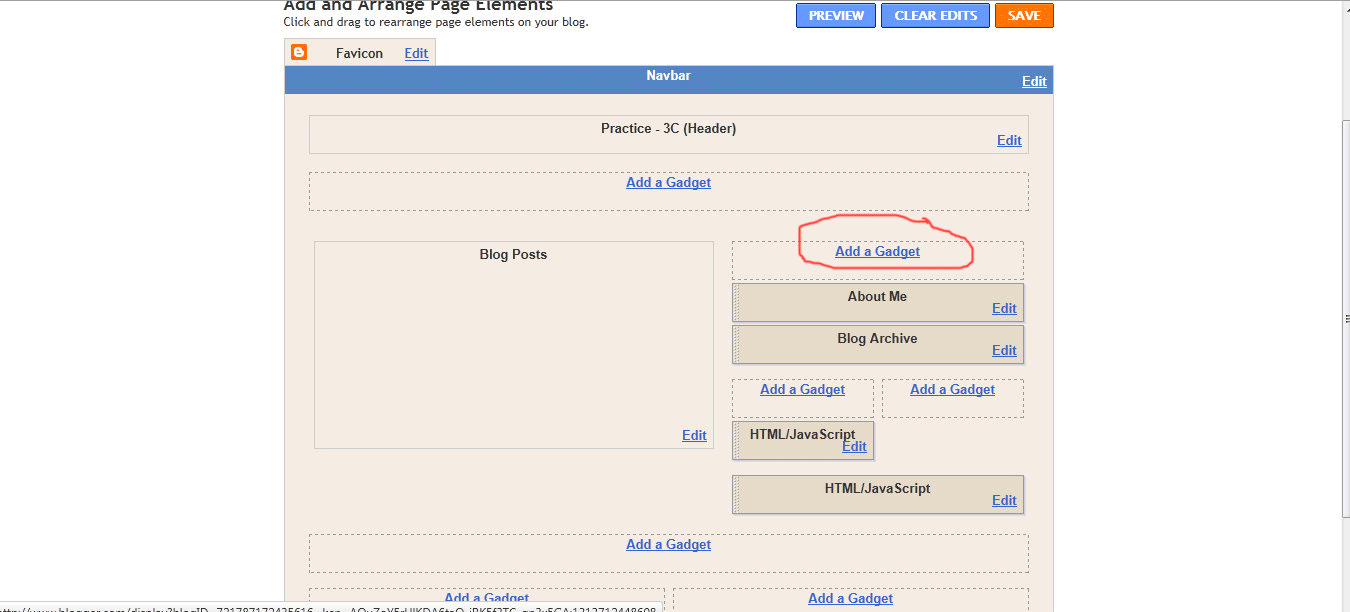
7. Go back to your blog. Select "DESIGN" (Upper right hand corner).
8. You are in "ADD AND ARRANGE PAGE ELEMENTS". Select "ADD A GADGET".
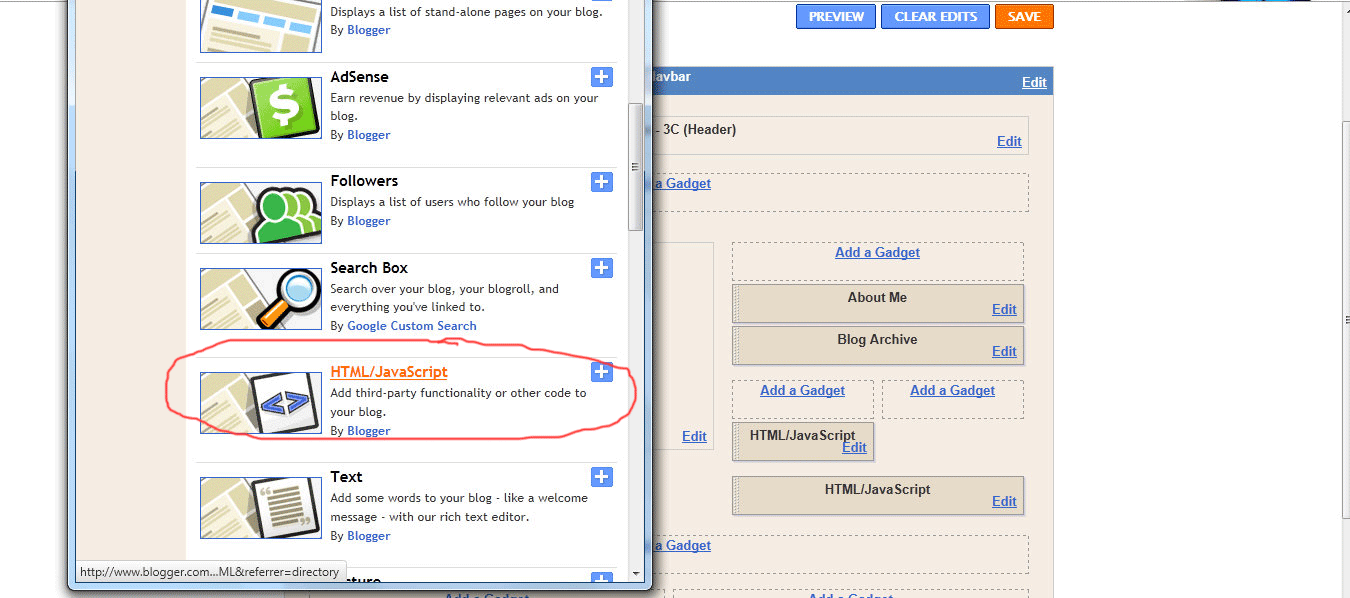
9. Choose "HTML/JAVASCRIPT".
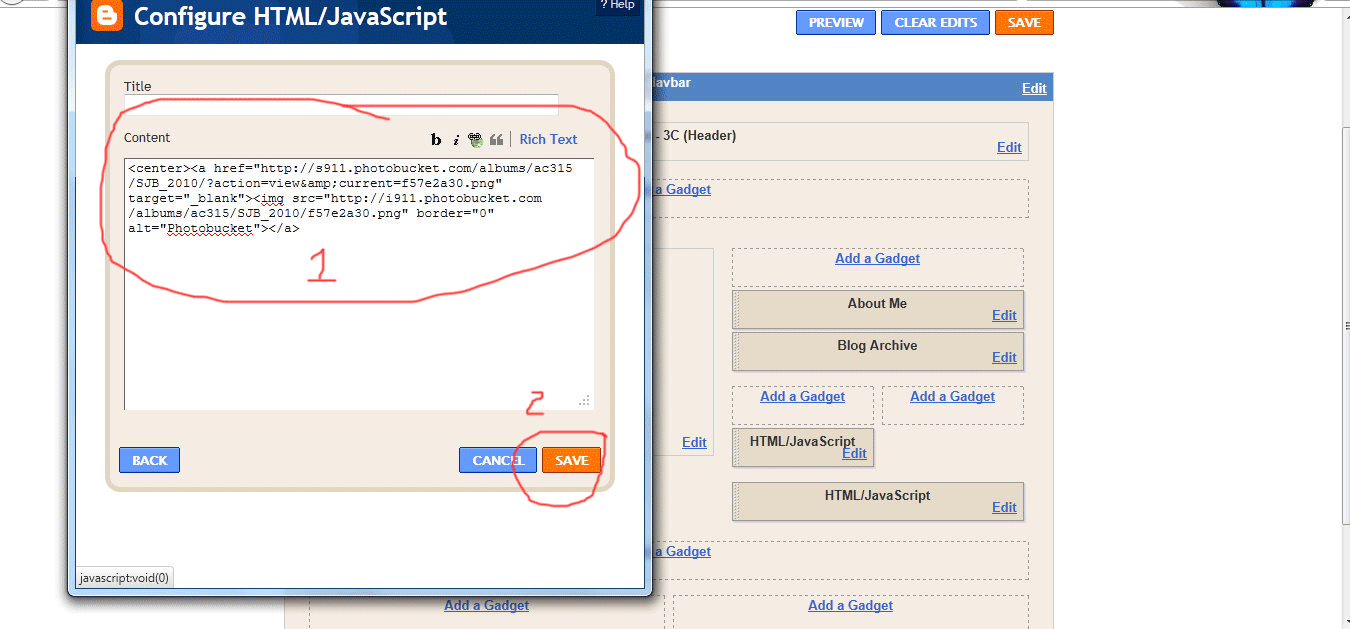
10. You are in "Configure HTML/JavaScript. Copy code from photobucket (No. 6) and paste.
Note: Make sure to add this <center> to centering your image. Save.
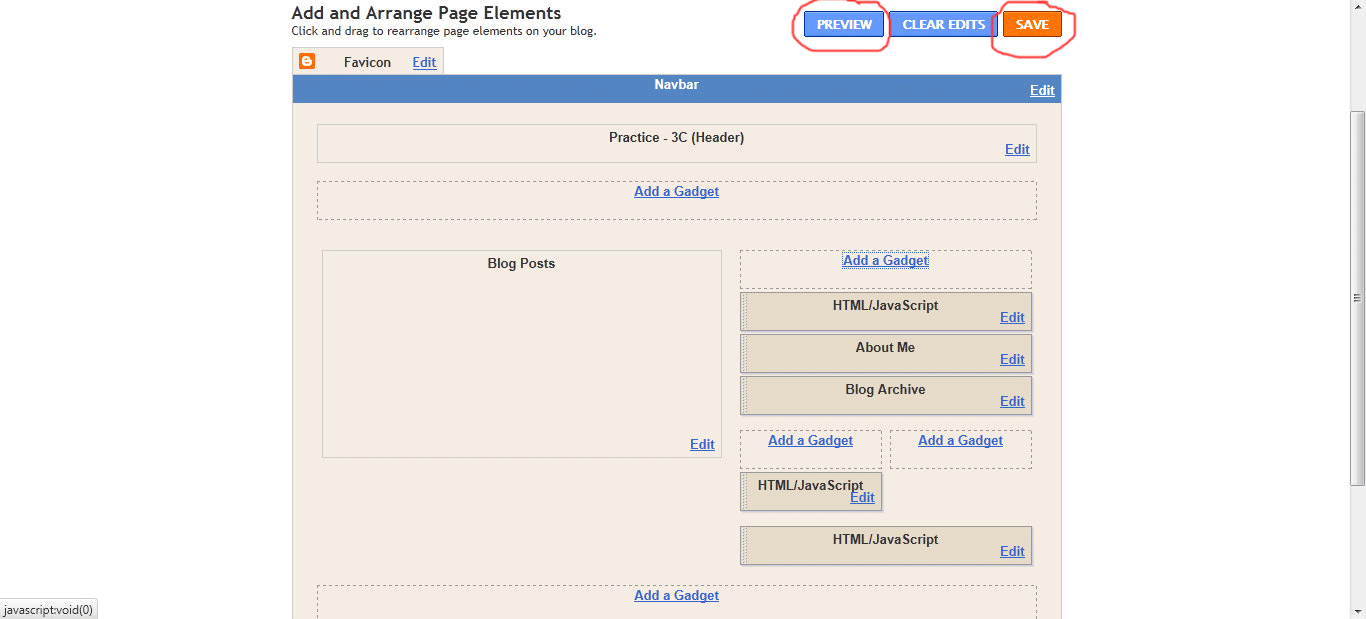
11. Click "PREVIEW AND SAVE".
13. Tadaaaa...